Suppose that you want to make a beautiful photograph like this:

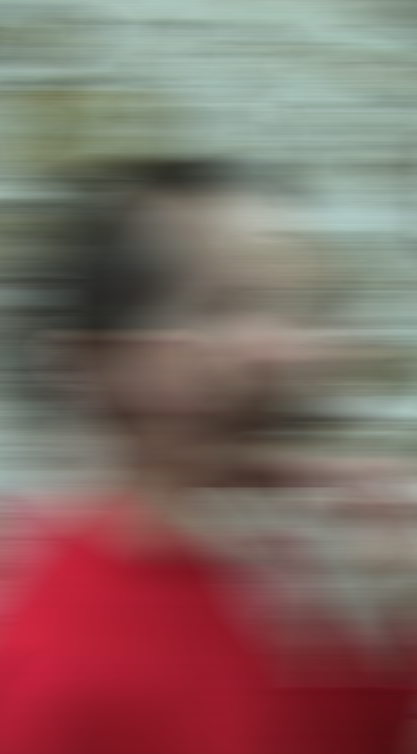
but you move the camera, so you obtain something like this:
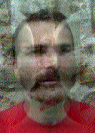
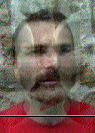
Then there is a way to obtain an image like this:
Actually, the blurred image was created by software from the previous photograph. (Each pixel is the average of 40 pixels). As a result, the blurs are perfectly horizontal, and this makes the image treatment a lot easier.
I will take a single row from the blurred image, at the indicated position:

Slightly enlarged, it looks like this:
![]()
And of course, it is a combination of red, green and blue:
![]()
![]()
![]()
The small differences in intensity provide a clue to restore the original picture.
Because each pixel in the blurred image is the average of 40 pixels, the difference (of the intensity) of 2 pixels (say pixel 1 and 2) in the blurred image is only 1/40 of the difference of two pixels in the original image that are 40 pixels apart (say, pixel 1 and pixel 41).
So the blurred picture tells differences, not exact values.
To obtain the exact values, I must make a guess for the first 40 pixels.
(This means that I guess the values for 39 pixels that are outside the frame of the blurred picture).
How do I make the guess?
– If my guess for a pixel 1 is too high, it will make pixel 41, 81, 121 etc. too high as well
– similar if my guess is too low
– similar is my guess for pixel 2, or 3 etc. is too high/low
So I take
– the average of pixel 1, 41, 81, 121 etc.
– the average of pixel 2, 42, 82, 122 etc.
– etc…
– and the average op pixel 40, 80, 120 etc.
And then I adapt pixels 1 till 39 to make averages 1 till 40 as closely together as possible.
I cannot make the all averages EXACTLY the same, because I don’t choose pixel 40. When I have chosen pixels 1, 2, etc till 39, the value for pixel 40 follows from the blurred image.
The pixel values that are constructed in this way, show much more contrast:
![]()
![]()
![]()
and together, they define the color in the reconstructed picture, under the yellow row:
![]()
A more mathematical description is here: explanation.html
(note that, in the link, I gave the first pixel the number 0)
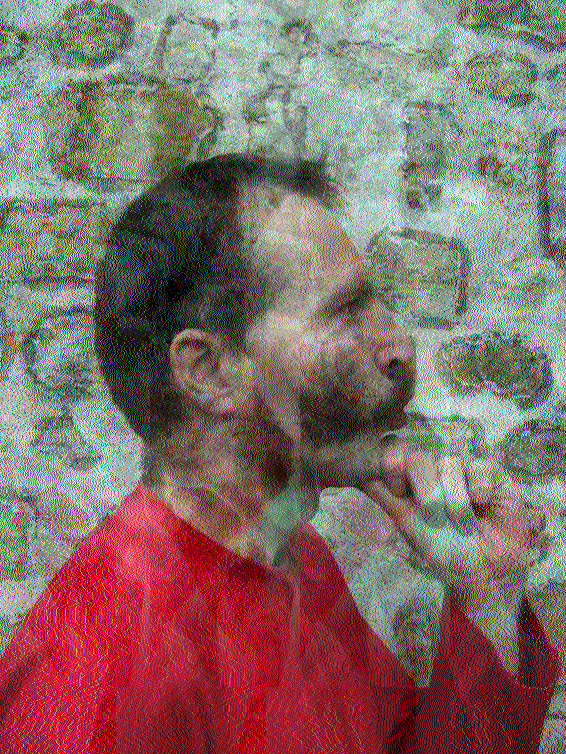
The method is not perfect: if a series of pixels was originally very bright, and another series much less, the latter will become too bright. In the reconstructed image, we some some ghostly echos of the dark hair.
This effect appears, of course, also for individual colors. In the next example, we see that the red shirt caused a kind of echo (in green) on the Adam’s apple and on the hand, where red is lacking:
(as you may have guessed, the original of this picture has a higher resolution. But then, it was blurred over 150 pixels)
Also, if you enlarge the reconstructed picture, you see that the color resolution has become very coarse.
This is a consequence of the loss of information when a photo is blurred.